Creating Digital Environments
Acerca de
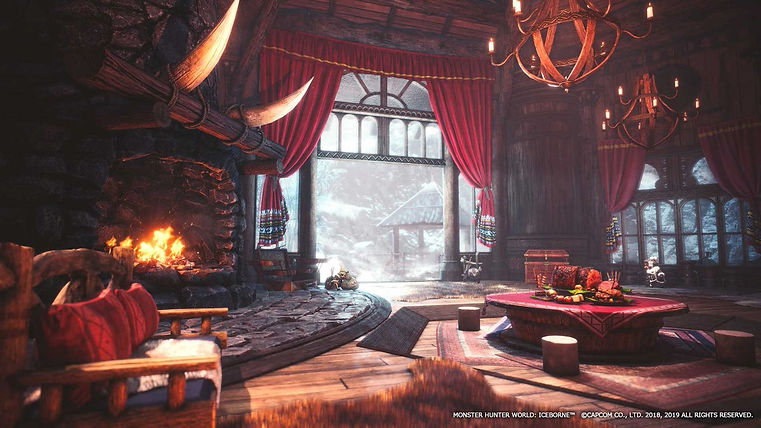
Iceborne Monster Hunter
Tasks Breakdown
Modeling

Texturing

Lighting
My three roles for this project were modeler, texturer and lighter.
Seeing as this was my first time lighting in Unreal, it seemed the smart choice would be to help out as much as I could earlier on during production but also not take on too many assets so I could move on to lighting as early as possible.
Because of the amount of space storage needed for Unreal, I had to resort to using an IT-desk computer that needed administration approval anytime a software download was made, and had a delayed start as a result .
Modeled & Textured Assets
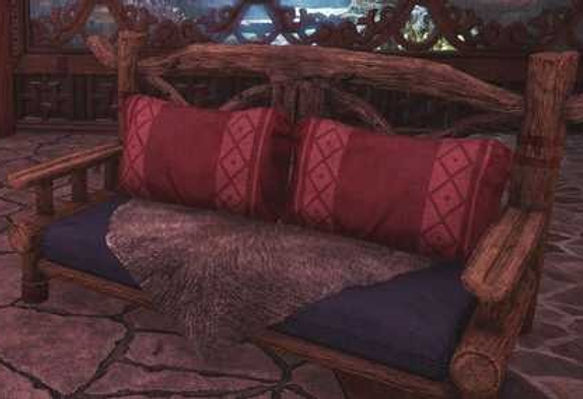
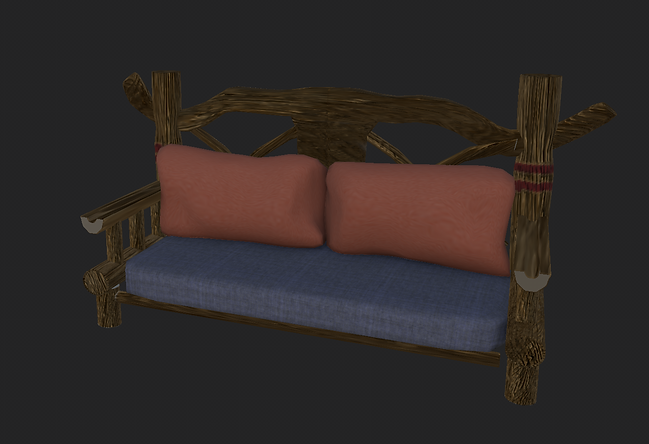
Modeled & Textured Couch
**due to lack of expertise and time constraints I was not able to replicate pillow textures to their entirety
I had fun modeling this asset as well as texturing; however, in hindsight, I would've given myself more time for texturing in order to better match the details on the reference.
I restarted this asset a couple of times, the most challenging part of the model was probably the backrest. The modeling technique that gave me the best results was simply adding edge along with a cylinder and modifying them to replicate the overall shape as best as I could.
The second most challenging was the pillows, however, once I started pushing vertices around with the sculpting tools, I was able to obtain the shape I wanted.
*fur on couch was modeled but not textured by me*
 |  |  |
|---|
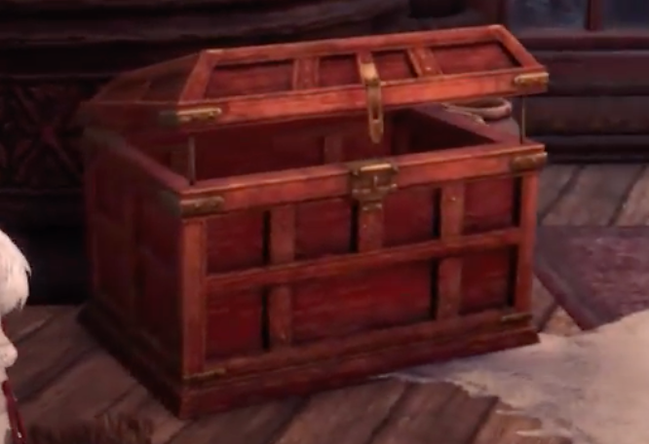
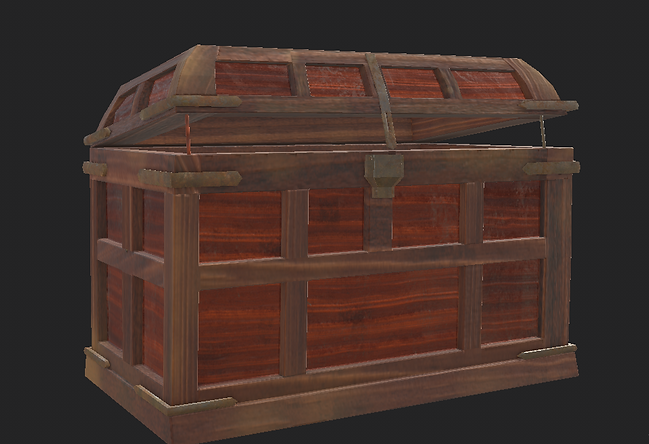
Modeled & Textured Chest
This model was surprisingly one of the most tedious ones. I jumped right at it without giving it much thought but soon realized there was a detail I was leaving out at first that could be easily implemented with some careful planning.
After getting a good model down, I once again into a tedious process with the UVs for this model. Because there were different wood materials and the direction of the wood was different for both, I had a painful back and forth process trying to get every shell facing the way it needed to be.
This was my first time modeling wood where the direction of the wood really mattered so I learned a lot about UV unwrapping wooden models from this particular asset.
 |  |  |
|---|
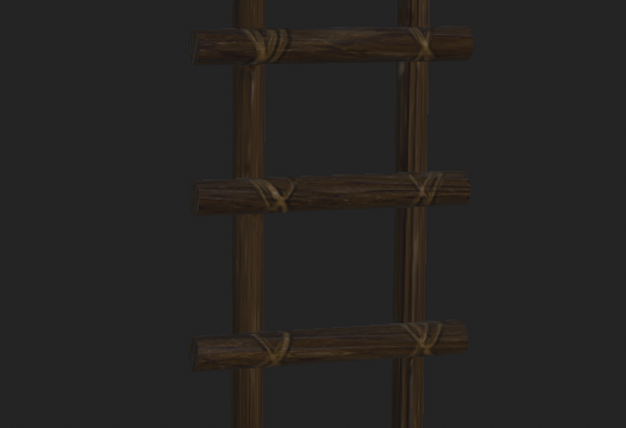
Modeled & Textured Ladder
As I approached the modeling for this asset, I figured I would be better off leaving the model as simple as possible and then adding all details within Substance, especially since it was more of a background asset. So I decided to get rid of the modeled ropes and fake them since they were a very small detail.
 |  |  |  |
|---|
Modeled & Textured Assets
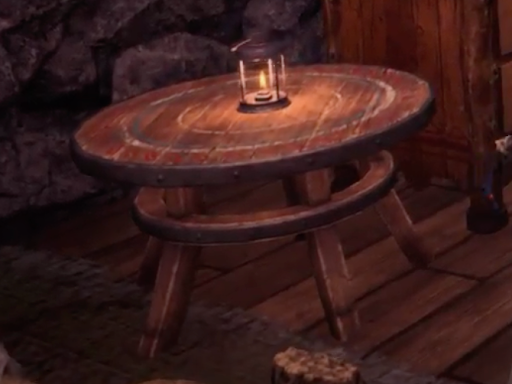
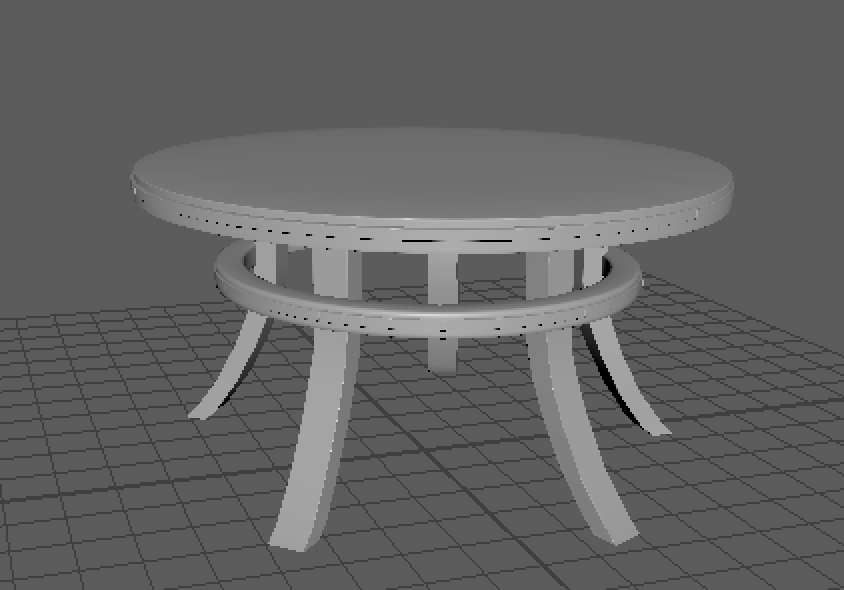
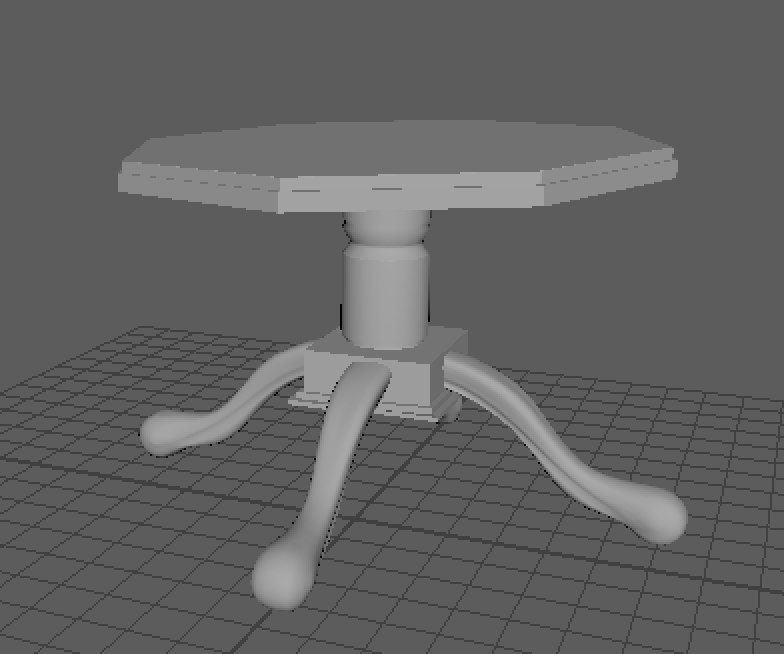
Unfortunately, these were the models I wasn't able to get to texture due to unforeseen issues with lighting.
In hindsight, I would've left off the second table to our Zbrush modeler because of the details on the legs of the table. Other than that, these models were pretty straightforward in the modeling and UV unwrapping process.
Lighting
Environment Lighting
I built up the environment modeling with a total of 4 lights; BP_Sky Sphere, a Directional Light, and a Sky Light.
I then added a Lightmass Importance Volume to the scene that surrounded the first floor, the stairs, and part of the second.
When setting up the Bp_Sky_Sphere and Sky Light I first concluded the time of day this scene was taking place. Because each reference I looked at had a different skylight, I decided to try to aim for a neutral, noon sun. With this in mind, I was able to position the Directional Light in a way that it would spill light coming in from the big windows of the first floor.
Afterward, I linked my Directional Light to my BP_Sky Sphere to have my lights were communicating with one another and also make sure I only had one light source for the Sun.
My Sky Light was then able to give me some fill light that helped me get some bounce lighting inside the room and light up the dark corners of our room which I linked up a cubemap from an HDRI of HDRIHaven.
Indoor Lighting
The indoor lighting was to my surprise a lot more challenging to nail down. Because the lights radiated a lot of ambient lighting, I had a tough time replicating the tone of the room. *These are currently still in process because I did not set up my static, stationary, and movable right correctly but will be working on an update to submit before the end of the semester.
Atmosphere/ Light Interaction
As I was giving the overall look of the scene a glance, I noticed there was a hint of atmosphere at the top of the room that was increasing the warm look of the room. So I went ahead and added a subtle fog effect with exponential height fog.